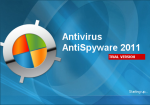

XP Antivirus 2012 is a fake anti-spyware program that is well known for promoting purchase of a full edition of XP Antivirus 2012 through vigorous Windows attention notifications. The XP Antivirus 2012 pop-up messages look very convincing which is why many PC users have succumb to the XP Antivirus 2012 program by paying upwards of $80 for it not knowing that it will not live up to its promises.
What does XP Antivirus 2012 do?
XP Antivirus 2012 was created with the main purpose of extorting money from computer users. This process is accomplished after the installation of XP Antivirus 2012 occurs. The installation of XP Antivirus 2012 may come automatically through a Trojan horse that is installed on a PC user’s system without their knowledge. Sometimes surfing a free porn site will allow this to happen. In other cases PC users may have downloaded some type of software from a P2P (peer 2 peer) network not knowing it was laced with malware.
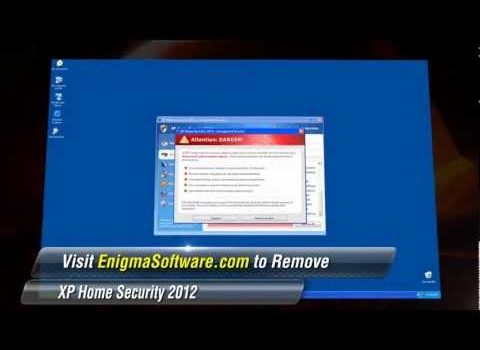
After XP Antivirus 2012 starts to load during startup of Windows, it presents users with a plethora of alert notifications that look rather legitimate to the untrained eye. These notices along with system scan results, are all fabricated by the XP Antivirus 2012 program. After the trust of XP Antivirus 2012 is gained through these bogus messages and system scan results, the computer user is apt to click on one which may redirect them to a purchase site for XP Antivirus 2012. If purchased, XP Antivirus 2012 will not remove any type of malware nor will it resolve previously stated PC issues. The best thing to do when presented with XP Antivirus 2012 is to take immediate action to remove it.
How Can You Remove XP Antivirus 2012?
XP Antivirus 2012 can be very difficult to manually remove if you are an inexperienced computer user. Not to mention, XP Antivirus 2012 has been known to populate the Windows Registry with many different entries and removing the wrong entries could render a PC damaged or useless. The use of a reputable antispyware or antivirus tool is recommended to safely remove XP Antivirus 2012 from your Windows computer.
To easily remove XP Antivirus 2012, find the following process and end them in the task manager. After that is done, delete each related XP Antivirus 2012 file from your hard drive. In additional to locating the following processes, it is recommended that you delete the XP Antivirus 2012 registry entries listed below as well. It is also a good idea to uninstall the XP Antivirus 2012 application via your add/remove programs function found in the Windows Control Panel if your system recognizes XP Antivirus 2012 has an installed program.
XP Antivirus 2012 files (and folders) to remove:
- %AppData%\Local\random.exe
- %AppData%\Local\.exe
- %Temp%\random.exe
- %AllUsersProfile%\random.exe
- %AppData%\Roaming\Microsoft\Windows\Templates\random.exe
XP Antivirus 2012 registry entries to remove:
- HKEY_CURRENT_USER\Software\Classes\.exe\DefaultIcon “(Default)” = ‘%1′ = ‘”%UserProfile%\Local Settings\Application Data\.exe” /START “%1″ %*’
- HKEY_CURRENT_USER\Software\Classes\.exe\shell\runas\command “IsolatedCommand” = ‘”%1″ %*’
- HKEY_CURRENT_USER\Software\Classes\exefile\DefaultIcon “(Default)” = ‘%1′
- HKEY_CURRENT_USER\Software\Classes\exefile\shell\runas\command “(Default)” = ‘”%1″ %*’
- HKEY_CLASSES_ROOT\.exe\shell\open\command “(Default)” = ‘”%UserProfile%\Local Settings\Application Data\.exe” /START “%1″ %*’
- HKEY_CLASSES_ROOT\.exe\shell\runas\command “IsolatedCommand” = ‘”%1″ %*’
- HKEY_CLASSES_ROOT\exefile\shell\runas\command “IsolatedCommand” = ‘”%1″ %*’
- HKEY_LOCAL_MACHINE\SOFTWARE\Clients\StartMenuInternet\FIREFOX.EXE\shell\safemode\command “(Default)” = ‘”%UserProfile%\Local Settings\Application Data\.exe” /START “C:\Program Files\Mozilla Firefox\firefox.exe” -safe-mode’
- HKEY_CURRENT_USER\Software\Classes\.exe “Content Type” = ‘application/x-msdownload’
- HKEY_CURRENT_USER\Software\Classes\.exe\shell\runas\command “(Default)” = ‘”%1″ %*’
- HKEY_CURRENT_USER\Software\Classes\exefile “Content Type” = ‘application/x-msdownload’
- HKEY_CURRENT_USER\Software\Classes\exefile\shell\open\command “IsolatedCommand” = ‘”%1″ %*’
- HKEY_CLASSES_ROOT\.exe\DefaultIcon “(Default)” = ‘%1′
- HKEY_CLASSES_ROOT\.exe\shell\runas\command “(Default)” = ‘”%1″ %*’
- HKEY_CLASSES_ROOT\exefile\shell\open\command “IsolatedCommand” = ‘”%1″ %*’
- HKEY_LOCAL_MACHINE\SOFTWARE\Clients\StartMenuInternet\FIREFOX.EXE\shell\open\command “(Default)” = ‘”%UserProfile%\Local Settings\Application Data\.exe” /START “C:\Program Files\Mozilla Firefox\firefox.exe”‘
- HKEY_CURRENT_USER\Software\Classes\.exe “(Default)” = ‘exefile’
- HKEY_CURRENT_USER\Software\Classes\.exe\shell\open\command “IsolatedCommand” = ‘”%1″ %*’
- HKEY_CURRENT_USER\Software\Classes\exefile “(Default)” = ‘Application’
- HKEY_CURRENT_USER\Software\Classes\exefile\shell\open\command “(Default)” = ‘”%UserProfile%\Local Settings\Application Data\.exe” /START “%1″ %*’
- HKEY_CURRENT_USER\Software\Classes\exefile\shell\runas\command “IsolatedCommand” – ‘”%1″ %*’
- HKEY_CLASSES_ROOT\.exe\shell\open\command “IsolatedCommand” = ‘”%1″ %*’
- HKEY_CLASSES_ROOT\exefile “Content Type” = ‘application/x-msdownload’
- HKEY_CLASSES_ROOT\exefile\shell\open\command “(Default)” = ‘”%UserProfile%\Local Settings\Application Data\.exe” /START “%1″ %*’
- HKEY_LOCAL_MACHINE\SOFTWARE\Clients\StartMenuInternet\IEXPLORE.EXE\shell\open\command